

Do you find yourself performing the same tasks repeatedly in Excel? Whether it’s formatting data, creating reports, or calculating values, these repetitive tasks can eat up valuable time. Enter macros—Excel’s built-in automation tool that transforms your workflow and boosts productivity.
In this blog, we’ll explore what macros are, how to record and use them, and why they’re a must-have skill for anyone looking to save time and avoid manual errors.
A macro is a set of instructions that tells Excel to perform a series of actions automatically. Think of it as recording your steps in Excel and replaying them whenever needed, like a shortcut for a complex task.
Why Use Macros?
Before you start recording macros, you need to enable the Developer tab, which houses all the tools for creating and managing macros.
How to Enable the Developer Tab:
You’ll now see the Developer tab in your ribbon, ready to help you create macros!
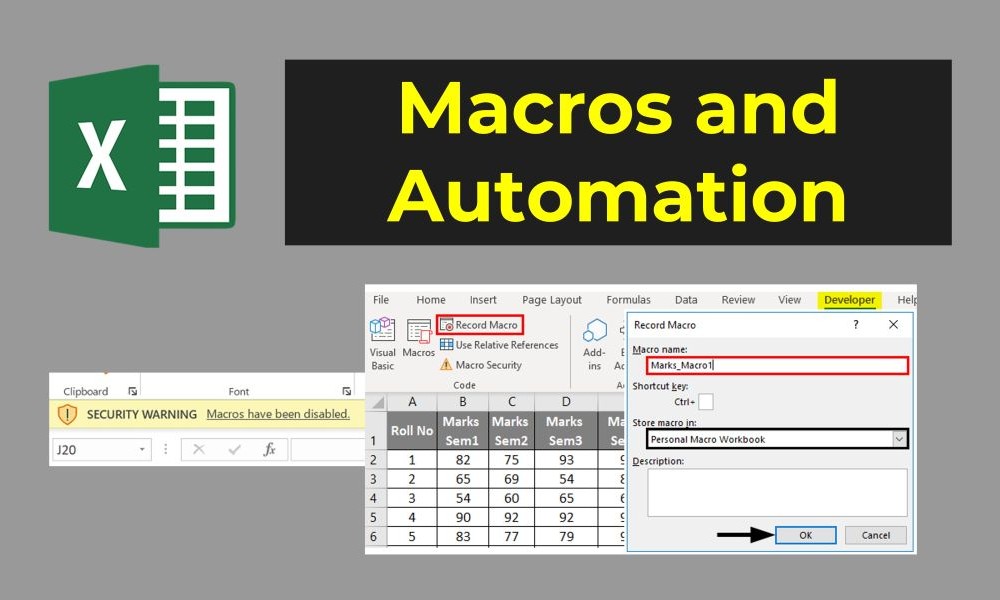
Recording a macro is as simple as pressing a button. Here’s a step-by-step guide to record and run your first macro:
Step 1: Start Recording
Step 2: Perform the Actions While the macro is recording, perform the steps you want to automate. For example:
Step 3: Stop Recording Click Stop Recording in the Developer tab when you’re done.
Step 4: Run the Macro
Want to tweak your macro? Excel’s macros are powered by Visual Basic for Applications (VBA), a programming language that allows you to edit and customize your recorded actions.
How to Edit a Macro:
Example: Let’s say your macro highlights rows based on a condition. You can modify the VBA code to refine the criteria or add new actions.
Imagine you’re generating a weekly sales report that requires the same steps:
Instead of doing this manually every week, you can record a macro to automate the entire process. With one click, your report is ready in seconds!
Since macros can run automated actions, it’s important to ensure they’re safe to use, especially if you’re sharing files.
Macros are a powerful way to automate tasks, save time, and reduce errors in Excel. Whether you’re formatting reports, processing data, or creating summaries, mastering macros will take your Excel skills to the next level.
In our final blog of this series, we’ll dive into Excel tips and tricks—sharing hacks to make you even more efficient. Stay tuned for the grand finale!
